
Imagine a charming little plant sitting on your windowsill, its round, coin-like leaves catching the light like emerald treasures. That’s the magic of the Chinese Money Plant—officially known as Pilea peperomioides. And guess what? You don’t have to settle for just one.
Ready to transform your humble Pilea into a leafy empire? Let’s dive into how to multiply your Chinese Money Plant quickly, easily, and with loads of leafy love.
Why Multiply Your Pilea?
More Plants, More Joy
- Gift-Giving – Who wouldn’t smile at a cute baby Pilea in a pretty pot?
- Home Decor – Group several Pileas for a lush, stylish display.
- Backup Plan – If your mother plant has a rough patch, you’ll have clones ready to carry the torch.
Is there really such a thing as too many Pileas?
The Basics: Meet Your Pilea’s Baby-Making Superpowers
Pileas are propagation pros. Why? Because they produce pups—tiny offshoots growing at the plant’s base or along its roots.
These pups are your ticket to multiplying your Chinese Money Plant. Think of them as miniature versions of the parent plant, just waiting for their chance to shine.
But how do you get from baby Pilea to a thriving new plant?
Let’s get our hands dirty.
When Is the Right Time to Propagate?
Timing is everything. So, when should you snip those pups?
- Spring and Early Summer – Best growing season for faster root development.
- Healthy Mother Plant – Don’t propagate from a stressed, sick, or struggling plant.
- Visible Roots or Height – Wait until pups are about 2-3 inches tall or show small root systems.
If your Pilea looks lush and pups are poking out from the soil, it’s go time!
How to Multiply Your Chinese Money Plant: Step-by-Step Guide
Ready for the fun part? Let’s walk through how to multiply your Chinese Money Plant like a pro.
Step 1: Gather Your Tools
Before you start, grab your essentials:
- Clean, sharp scissors or pruning shears
- A small trowel or spoon (for digging around pups)
- Fresh potting mix (well-draining soil is key)
- Small pots with drainage holes
- Water mister or watering can
Clean your tools to avoid spreading diseases between plants.
Step 2: Identify the Pups
Look for:
- Soil Pups – Sprouting directly from the soil, connected by roots.
- Stem Pups – Growing off the mother’s stem above the soil.
Soil pups are easiest for beginners because they’re often bigger and come with roots attached.
Step 3: Gently Remove the Pup
For Soil Pups:
- Use your trowel to loosen the soil around the pup.
- Gently lift the pup and try to keep its roots intact.
- Snip it off from the mother plant using your clean scissors.
For Stem Pups:
- Locate the pup growing on the mother’s stem.
- Cut carefully where it joins the main stem.
- Expect fewer roots—these will need extra care to root successfully.
Step 4: Root the Pup
Soil pups with roots can go straight into soil. But what about pups without roots?
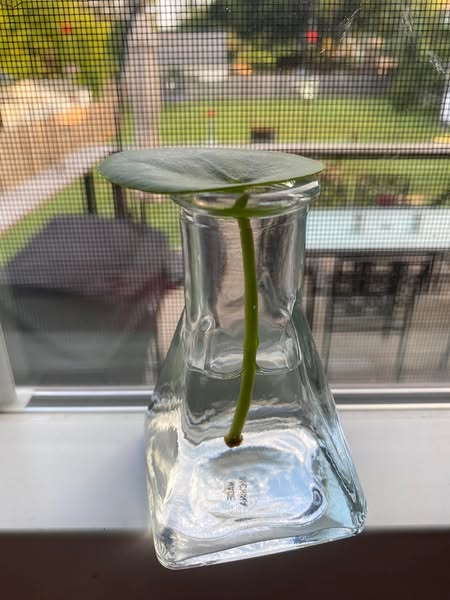
Water Propagation:
- Place the stem cutting in a jar of clean water.
- Keep leaves above water to prevent rot.
- Change water every few days.
- Roots should appear in 2-4 weeks.
Once you see roots about an inch long, transplant into soil.
Step 5: Pot Up Your Pup
- Fill a small pot with well-draining soil.
- Plant the pup at the same depth it grew before.
- Water gently but thoroughly.
Place the new plant in bright, indirect light. Watch it settle into its new home!
Step 6: Care for Your New Plant
Baby Pileas need a gentle touch. Here’s how to keep them happy:
- Light – Bright but indirect sunlight. Avoid harsh afternoon rays.
- Water – Let the top inch of soil dry out between waterings.
- Humidity – Pileas like moderate humidity but aren’t super fussy.
- Feeding – A diluted liquid fertilizer every 4-6 weeks during the growing season.
Isn’t it exciting to watch tiny leaves unfurl?
Common Propagation Mistakes (and How to Avoid Them)
Even green thumbs slip up sometimes. Let’s dodge the most frequent propagation pitfalls:
- Cutting Pups Too Early – Wait until they’re big enough to survive alone.
- Root Damage – Dig carefully so you don’t tear delicate roots.
- Overwatering New Pups – Too much moisture causes rot. Let soil dry slightly between waterings.
- Low Light – Insufficient light slows growth and makes your Pilea leggy.
- Dirty Tools – Always sterilize blades to keep bacteria at bay.
Have you ever made any of these mistakes?
Can You Propagate Pilea from Leaves?
A common question pops up for Pilea lovers:
Can you grow new plants from a single Pilea leaf?
Sadly, no. Unlike succulents or peperomias, Pilea leaves won’t produce roots or pups on their own. A leaf might stay fresh in water for a while, but it won’t transform into a new plant.
Propagation success relies on stem tissue or pups connected to the root system. So focus your efforts on those lively little offsets!
Bonus: Creative Display Ideas for Your New Pilea Plants
Once you’ve multiplied your Pilea collection, why not show off your handiwork?
- Mini Plant Gifts – Decorate small pots and share with friends.
- Windowsill Forest – Line them up along a bright sill for an indoor green oasis.
- Terracotta Cluster – Plant multiples in terracotta pots for a charming rustic vibe.
- Macramé Hangers – Elevate your plants (literally) with hanging displays.
- Plant Shelf Styling – Mix Pileas with other plants for texture and contrast.
Which idea fits your style?
Troubleshooting New Pilea Growth
Sometimes your newly propagated plants hit a bump in the road. Here’s how to fix it fast:
Yellowing Leaves
- Overwatering or poor drainage
- Check soil moisture and adjust watering schedule
Drooping or Wilting
- Underwatering
- Move away from cold drafts
Slow Growth
- Not enough light or nutrients
- Try brighter indirect light and gentle fertilizer
Keeping an eye on these signs ensures your Pilea family thrives.