
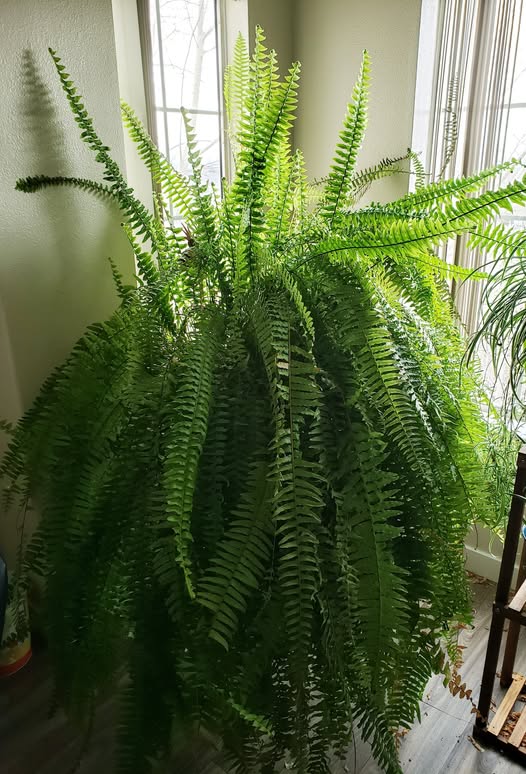
Graceful, arching, and rich with texture, the Boston fern (Nephrolepis exaltata) is a timeless indoor and outdoor favorite. Its lush green fronds can transform a dull corner into a vibrant oasis—but without a little upkeep, this charming houseplant can become overgrown, messy, and even unhealthy.
So how do you keep your fern looking fresh and fabulous year-round? Pruning is the secret. Whether you’re a beginner plant parent or a seasoned greenery guru, this article will teach you exactly how to prune a Boston fern – quick tips for a fuller, happier plant. We’ll walk you through when, why, and how to trim it back, plus offer post-pruning care and common mistakes to avoid.
Get your scissors ready—let’s rejuvenate that fern!
Why Prune a Boston Fern?
Pruning isn’t just about appearances—it’s a vital part of plant health and longevity. Think of it as decluttering for your fern. Removing dead or dying fronds opens up space for new growth, boosts airflow, and helps your plant thrive.
Top Benefits of Pruning Your Boston Fern
- Encourages fuller growth: Trimming stimulates new fronds to grow from the crown.
- Prevents disease: Dead or rotting foliage can harbor fungus and pests.
- Improves appearance: Say goodbye to leggy, crispy, or yellowing fronds.
- Promotes even shape: Regular shaping keeps your fern balanced and symmetrical.
Over time, unpruned ferns can become too dense in the middle, leading to poor air circulation and limited light penetration—two key ingredients your fern needs to flourish.
When is the Best Time to Prune a Boston Fern?
Just like people, plants have natural rhythms. Knowing when to prune can make a big difference in how quickly and successfully your fern recovers.
Spring and Early Summer: The Growth Season
The best time to give your Boston fern a good trim is during its active growing season, typically spring through early summer. During this period, the plant is eager to grow and bounce back quickly from a pruning session.
Light Touches in Fall and Winter
While you should avoid heavy pruning in the cooler months, it’s okay to gently remove a few dead fronds or tidy up brown tips in fall or winter. Just be conservative—since growth slows, it may take longer for the plant to regenerate.
Tools You’ll Need Before You Start
A little preparation can go a long way. Clean tools make cleaner cuts and reduce the chance of introducing diseases to your plant.
Your Pruning Toolkit
- Sharp scissors or pruning shears – Dull blades can crush the stems instead of slicing them.
- Disinfectant or rubbing alcohol – Always sterilize your tools before and after pruning.
- Gardening gloves – Optional, but useful for handling dusty or delicate foliage.
- A small rake, comb, or your fingers – To detangle and gently clean the center of the plant.
With everything ready, you’ll be set to prune with confidence and care.
How to Prune a Boston Fern – Quick Tips for a Fuller, Happier Plant
Let’s break down the pruning process into manageable steps. Each step plays a role in creating a healthier and more attractive fern.
Step 1: Inspect Your Fern
Before diving in, take a moment to examine your plant. Spread out the fronds to get a full view of the interior and base.
What Are You Looking For?
- Brown or yellow fronds – Usually a sign of age, low humidity, or overwatering.
- Crispy tips – Common in dry indoor environments.
- Sparse, weak growth – May need trimming to stimulate new shoots.
- Overlapping or tangled sections – Can hinder airflow and light.
This inspection helps you decide what to remove and where to focus your pruning efforts.
Step 2: Remove Dead or Damaged Fronds
The first priority is getting rid of anything clearly unhealthy. These fronds won’t recover and can sap energy from the plant.
How to Do It Right
- Trace the dead frond down to its base.
- Snip it as close to the soil or crown as possible.
- Repeat for all visibly lifeless or heavily damaged fronds.
💡 Tip: Gently tug on the frond before cutting—if it pulls away easily, it’s ready to go.
Removing this old growth clears the way for the fern to redirect nutrients to new, vibrant fronds.
Step 3: Trim for Shape and Symmetry
Now that the deadweight is gone, it’s time to address the aesthetics. A well-shaped fern looks fuller and grows more evenly.
Here’s What to Focus On:
- Overly long fronds that dangle too far or touch the ground.
- Unbalanced sections—one side might be more overgrown than the other.
- Fronds crowding each other, creating a tangled mess.
Use your shears to shape the plant into a gentle dome or round silhouette. This not only looks appealing but encourages even sun exposure and air circulation.
✅ Golden Rule: Never cut more than one-third of the plant’s total foliage at once.
Step 4: Clean Out the Center
Boston ferns often become too dense at the core, blocking air and light from reaching the base.
Why It Matters
- Thick buildup can create a damp environment that invites rot or pests.
- Lack of airflow leads to stunted growth and browning from the inside out.
Use your fingers or a small comb to gently tease out dead debris. Then, cut any small stems or shriveled fronds at the base. Think of this as clearing out the “cluttered attic” of your plant.
Step 5: Clean Up and Compost Responsibly
Don’t let the trimmings linger around your plant or pot—it can lead to disease or mold buildup.
🪴 Do this instead:
- Discard all brown, diseased, or pest-infested trimmings.
- Compost healthy green material for garden use.
- Wipe down nearby surfaces and sweep away fallen bits.
Your plant is now lighter, cleaner, and ready for regrowth.
Common Boston Fern Pruning Mistakes to Avoid
1. Over-pruning in one session
Removing too much can shock your plant. Space out major trims across a few weeks if necessary.
2. Cutting too deep into the crown
This central part of the fern is crucial. Damage here can halt growth entirely.
3. Leaving dead tips untrimmed
Brown tips won’t turn green again. Trimming them neatly gives your fern a refreshed look.
4. Using dirty tools
Bacteria from old cuts can infect new wounds. Always clean your shears before and after use.
Aftercare: Helping Your Fern Recover and Thrive
A freshly pruned fern is like a person post-haircut—it’s reset and ready to grow, but it needs some care to look its best.
Watering
Stick to a consistent routine. Keep the soil moist but never soggy. Too much water can lead to root rot, especially after pruning.
Humidity
Boston ferns love moisture in the air. After pruning:
- Mist regularly.
- Use a pebble tray with water underneath the pot.
- Group plants together or run a humidifier nearby.
Feeding
Give your fern a gentle boost with a diluted liquid fertilizer about 1–2 weeks after pruning. This helps fuel new growth.
Light
Place your fern in bright, indirect light—like near an east-facing window. Avoid direct sun, which can scorch new fronds.
How Often Should You Prune Your Boston Fern?
Make pruning a regular habit, not a once-a-year panic.
Suggested Schedule:
- Light touch-ups: Every 2–4 weeks
- Full grooming: Every 4–6 months, ideally in spring or early summer
- Emergency pruning: Whenever there’s visible pest damage or rot
This rhythm keeps your fern full, happy, and manageable.
What if My Fern Looks Sparse After Pruning?
Don’t panic! It’s normal for your fern to look a little bare right after a trim, especially if you had to remove a lot of dead growth. With the right care, you’ll soon see bright green baby fronds sprouting from the base.
Keep humidity high and continue with gentle watering. Within weeks, you’ll notice a transformation.
FAQs About Pruning Boston Ferns
Can I cut all fronds if the fern looks completely dead?
If there’s any green left, the plant can recover. You can cut back to the crown and start fresh, but give it optimal care and time to bounce back.
Should I prune brown tips only or whole fronds?
If the browning is limited to tips, trimming those alone is fine. If the entire frond is yellow or brown, remove it at the base.
Can I propagate my fern from trimmed fronds?
Unfortunately, Boston ferns don’t propagate easily from cut fronds. They reproduce through underground runners (rhizomes) or division.